
|
|
HOME | Equipment | Stamping | Services | Quality | Contact Us |
| CAD | Wire EDM | CNC Mill | Process | Tooling | Parts |

The next few pages will give a brief overview of the process that typically occurs when a die is first created. Much of the detail will be glossed over, but the basic steps will be shown.
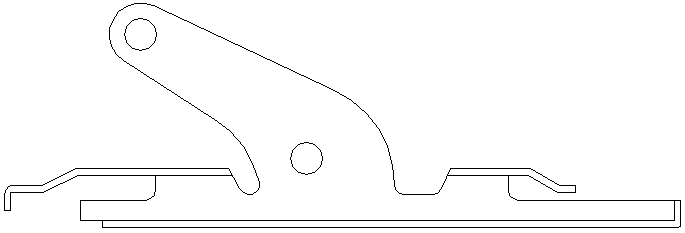
The design of the die begins with the part. A customer will either provide a prototype or part print of the desired product. Below is a diagram showing one of the parts we manufacture here at Gregg Tool & Die. The material used to manufacture this part is aluminum and the production rates can be in the millions.
This is a drawing showing a small metal clip that is part of a jalousie window. Jalousie windows and doors hold many rows of narrow glass panes. Each clip holds the edge of a pane. These clips are, in turn, connected to a mechanism that will open and close all these glass panes in unison.
This first diagram shows a top view of the clip.

This second view shows the side of the clip. The hole towards the center of the clip provides a pivot point. The second hole on the arm of the clip provides a connection point for the mechanism that turns the clip.
During the analysis phase there are numerous factors that influence the design. So before the layout of the die begins there are a few things that we may wish to consider:
Once the analysis phase is complete we can
begin the design of the die.
Next Page